Spesso può capitare di progettare un diorama od una scena strutturata su più livelli, e se decidessimo di non limitarci a ricreare un burrone od una scarpata, ma vogliamo provare a creare un muro di contenimento? ecco il metodo che ha messo a punto il sottoscritto, i materiali necessari sono:
Can often happen to design a diorama or a scene structured on several levels, and if we decided not to limit ourselves to recreate a ravine or a cliff, but we want to try to create a retaining wall? here is the method I developed, the materials needed are:
- Materiale per creare una cassaforma / Material to create a mold;
- Un supporto per il muro (legno di balsa, legno multistrato, una striscia di plasticard...) / Support for the wall (balsa wood, plywood, a strip of plasticard ...);
- Un taglierino / A utility knife;
- Colla vinilica (io uso la Pattex vinil legno, ma anche la Bison o altro va benissimo ) / PVA glue (I use Pattex vinyl wood, but also the Bison or else is good);
- Gesso scagliola / Gypsum plaster;
- Un cucchiaino / A teaspoon;
- Un pennello a punta piatta / A flat-tipped brush;
- Bicchieri di plastica / Plastic cups.
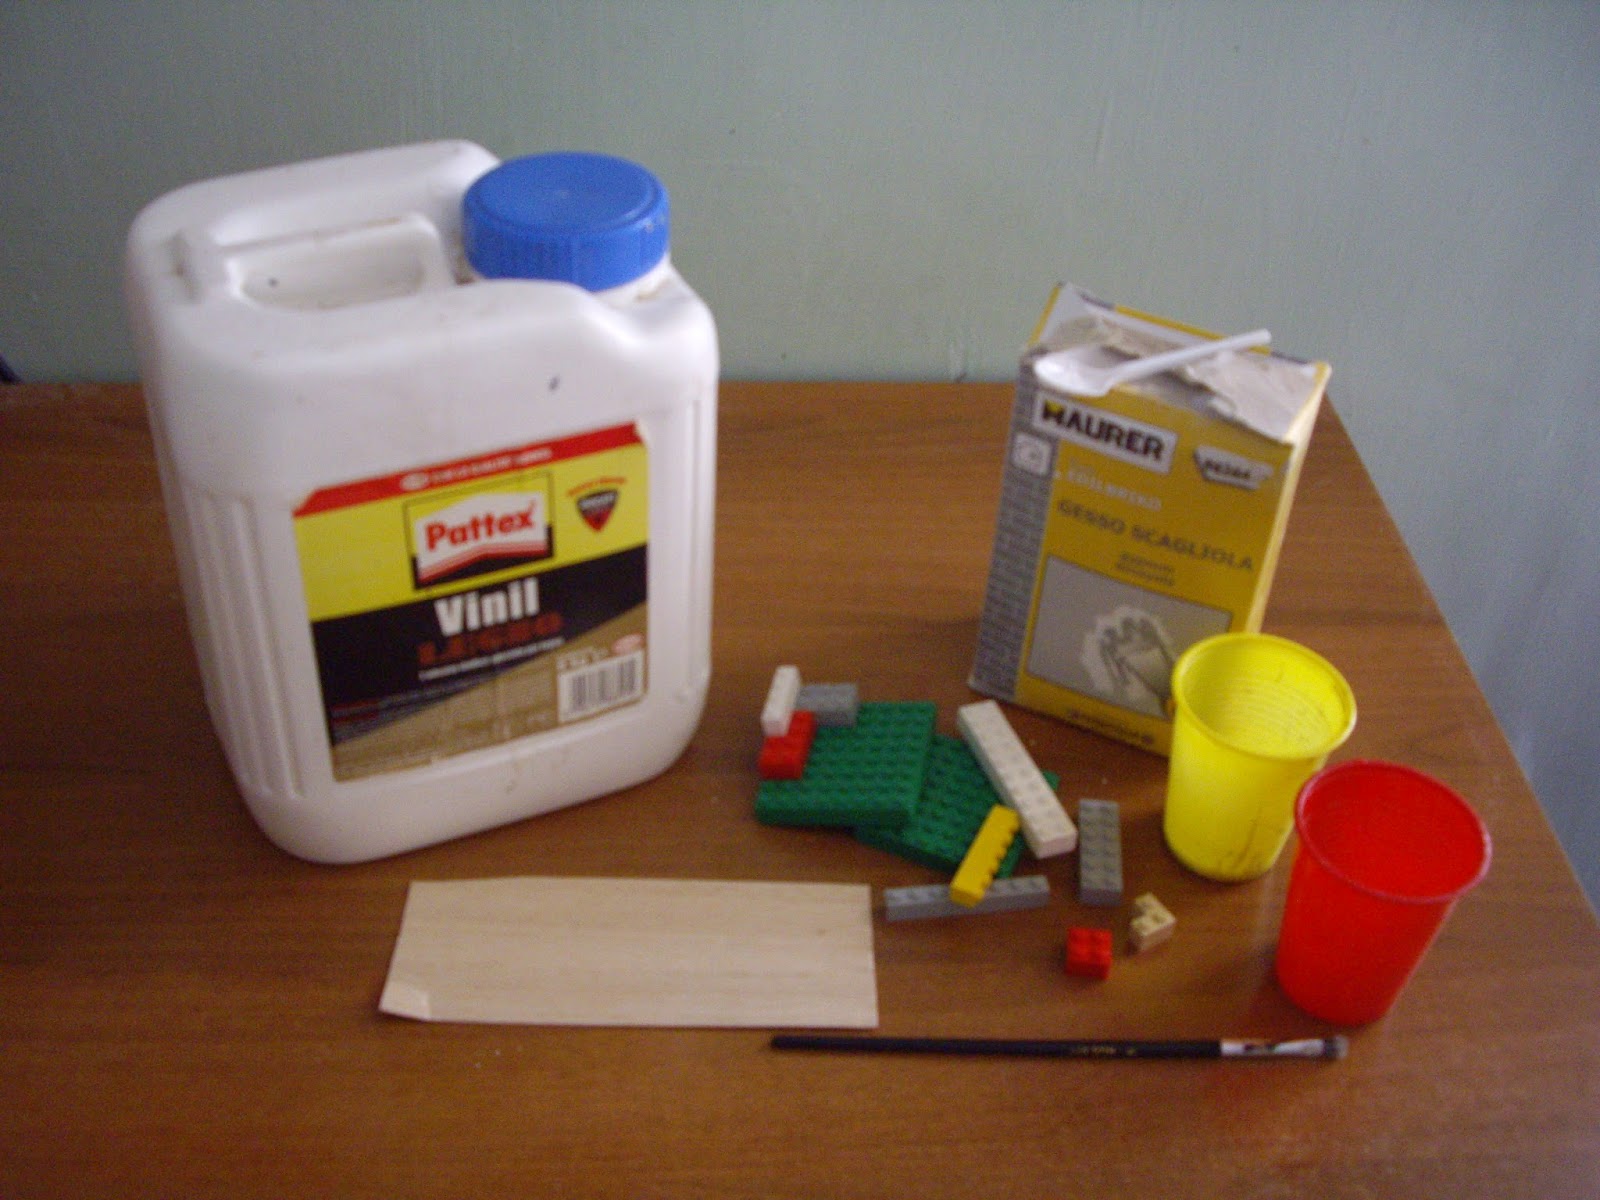 |
| L'occorrente / What we need |
Come cassaforma è da un po' di tempo che utilizzo i vecchi mattoncini Lego con cui giocavo quando ero piccolo; sono ottimi per creare forme e stampi delle dimensioni più varie ed hanno il vantaggio che una volta finito il lavoro, si possono smontare, sciacquare e riutilizzare ancora.
As mold I use now the old Lego bricks I played with when I was child; are great for creating shapes and molds of various dimensions and have the advantage that once finished the job, you can remove, wash and re-use them again.
 |
| Lo stampo di Lego / The Lego mold |
Costruiamo uno stampo delle dimensioni che riteniamo opportune alla scala ed alle dimensioni che abbiamo pensato, in maniera tale da ottenere, una volta asciutta, una lastra di gesso.
We build a mold of the dimensions that we believe appropriate to the scale and dimensions that we thought, in such a way we want to obtain, once dry, a plaster slab.
Procediamo poi mischiando in un bicchiere di plastica il gesso e l'acqua, fino ad ottenere un impasto omogeneo, né troppo grumoso né eccessivamente liquido, allo scopo vi consiglio di dosare l'acqua con una siringa senza ago, così da non correre il rischio di esagerare.
We then proceed by mixing in a plastic cup gypsum and water, until dough is smooth, not too lumpy or too liquid, for the purpose I recommend you to dose the water with a syringe needleless, so as not to run the risk to exaggerate.

Versiamo il composto nello stampo ed attendiamo l'asciugatura (facciamo passare almeno un giorno, ma può essere necessario aspettare di più a seconda delle condizioni di umidità e temperatura).
Smontiamo delicatamente i pezzi dello stampo ed estraiamo la nostra lastra di gesso.
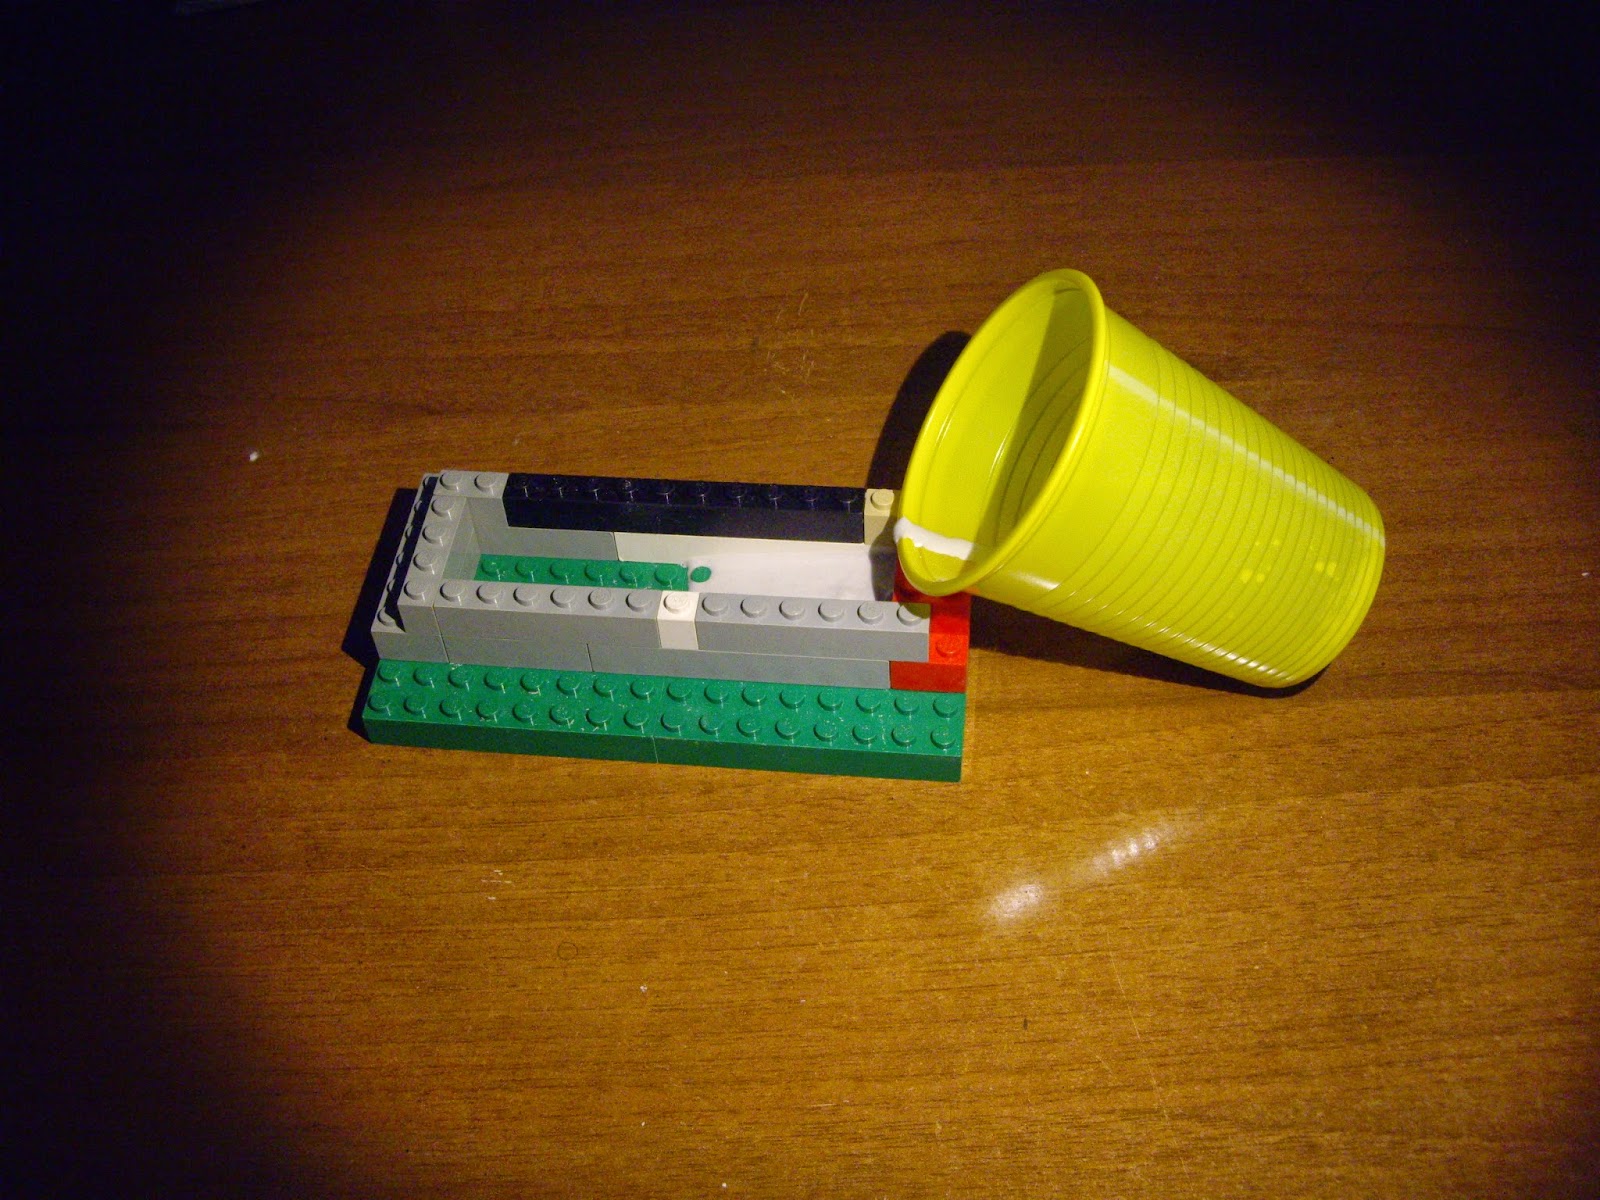 Pour the mixture into the mold and wait for drying (it requires at least one day, but it can take longer depending on the conditions of humidity and temperature).
We disassemble the pieces of the mold and carefully extract our plasterboard.
Con il taglierino facciamo a "strisce" la lastra dando dei colpi secchi per fratturare il gesso e rendere i pezzi irregolari, poi ripetiamo il procedimento tagliando le strisce in blocchetti, ossia nelle pietre che andremo ad utilizzare. Non preoccupiamoci se qualche pezzo si frattura o si rompe senza volerlo, farà comunque al caso nostro.
With the utility knife we make "strips" of gypsum giving the raps to fracture the plaster and make irregular pieces, then repeat the process by cutting the strips into blocks, ie in the stones we're going to use. Don't worry if some pieces fractures or breaks without meaning to, them will still do the job.

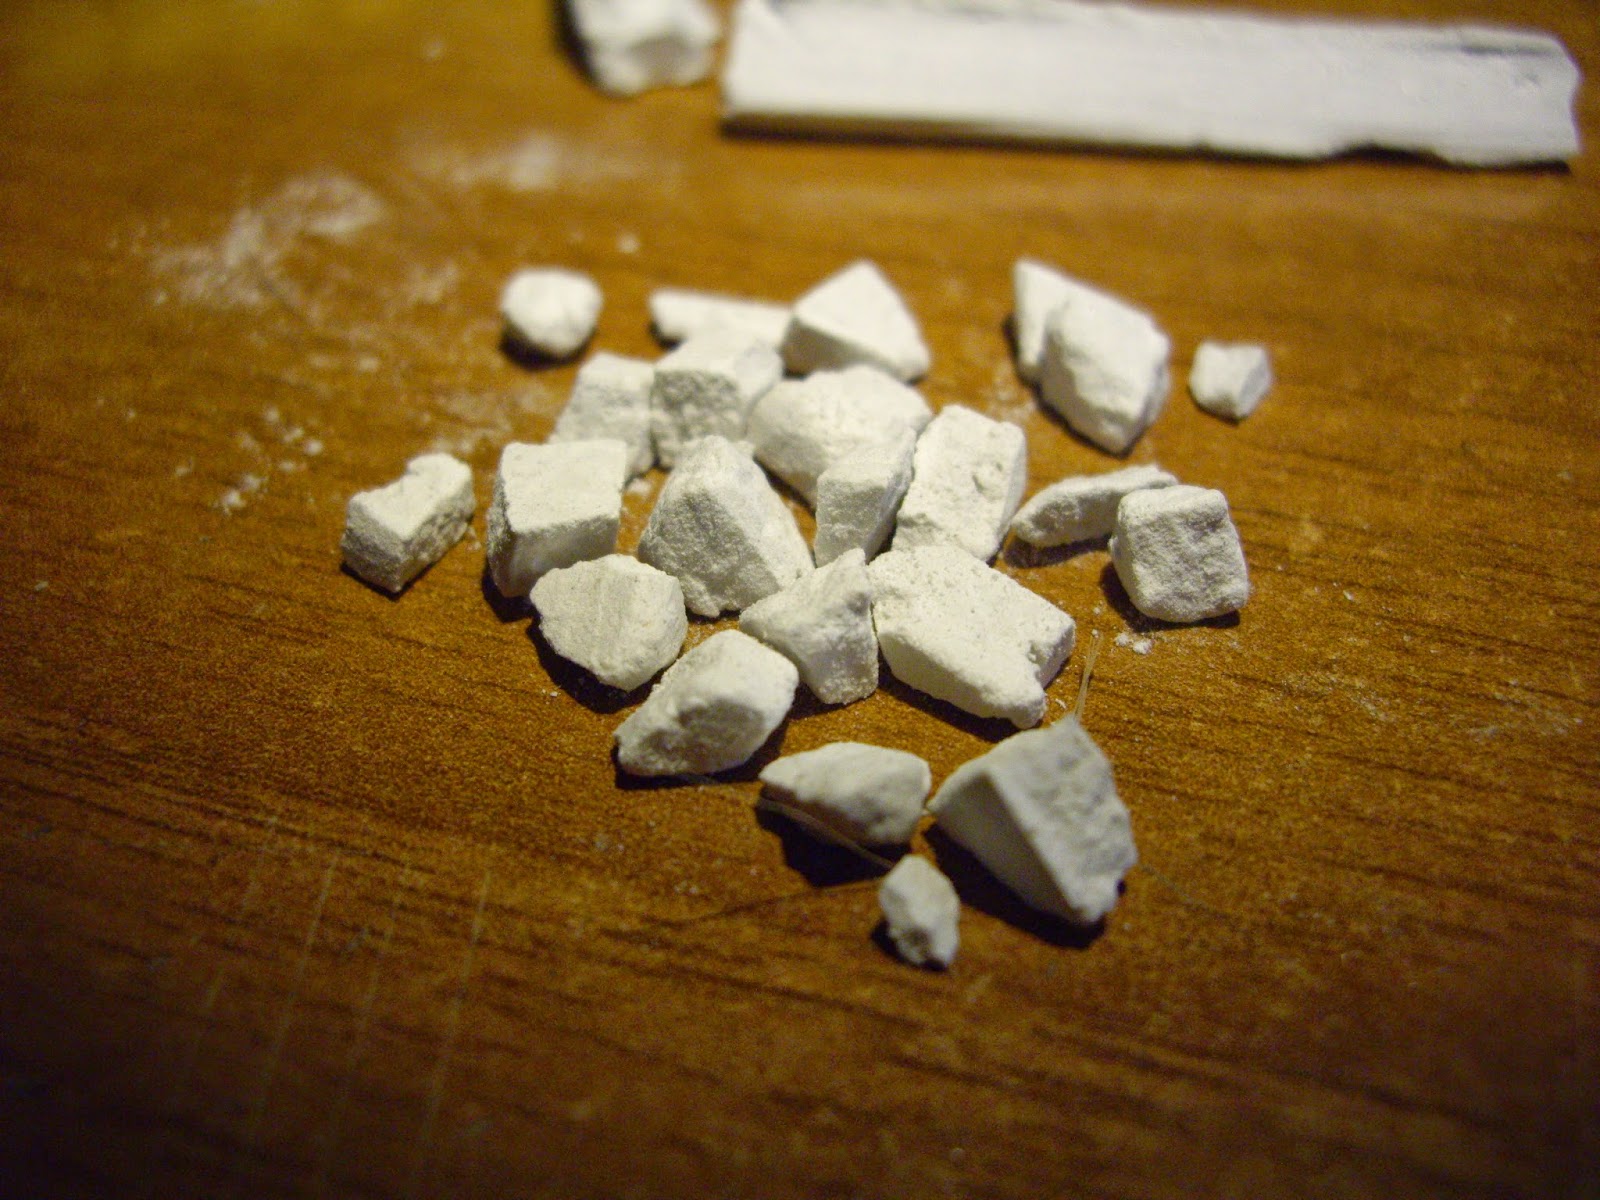 |
| I pezzi pronti / The ready pieces |
Ora prendiamo il supporto che abbiamo scelto e dipingiamolo di nero, quindi cominciamo ad incollarci sopra con la colla vinilica i pezzi di gesso preparati in precedenza, avendo cura di sistemarli in maniera credibile ed il più possibile naturale (a tal proposito può essere utile fare qualche prova a secco prima di procedere con l'incollaggio).
Now we paint black the support that we have chosen, then we begin to glue on it pieces of gypsum prepared previously, taking care to place them in a credible manner and as natural as possible (in this regard it may be useful to make some dry test before proceeding with bonding).


Una volta finito il lavoro, se siamo soddisfatti del risultato, mischiamo in un bicchiere di plastica acqua e colla vinilica fino ad ottenere un bel bicchiere di "latte" e spennelliamo il composto sul muro, quindi, aspettiamo l'asciugatura.
Once finished the job, if you are satisfied of the result, mix in a plastic cup water and glue until you get a nice glass of "milk" and brush the wall, then wait for drying.

Una volta che il tutto è asciutto, noteremo che la vinavil ha impermeabilizzato il gesso e reso l'opera più rigida, potremo quindi passare alla colorazione, in base ai nostri gusti o alle nostre esigenze.
Once everything is dry, you will notice that the PVA glue has sealed the plaster and made the piece more rigid, we can now go to with the painting, according to our tastes and our needs.
Se vogliamo ottenere un muro vecchio e con del verde tra le fessure, possiamo inserire negli interstizi del muschio (io ho usato quello per terraristica avendolo già a disposizione, ma ci sono molti prodotti, anche specifici, che possono fare al caso nostro), aiutandoci con un paio di struzzicadenti e ridare una mano di acqua e vinavil per sigillare anche questo passaggio.
If you want to obtain an old wall with grrenish moss among the blocks, you can insert in the interstices moss (I used one for vivarium having already available, but there are many products, even specific, that can use for this job), use a pair of chopsticks for helping and give a coat of water and PVA glue to seal everything.

 |
| Esempio di muro terminato con l'aggiunta di muschio / Exemple of finished wall with moss applied |
Una volta completato, il nostro muro di contenimento è pronto per essere inserito nel diorama che lo ospiterà.
Once completed, our retaining wall is ready to be inserted into the diorama that will host it.
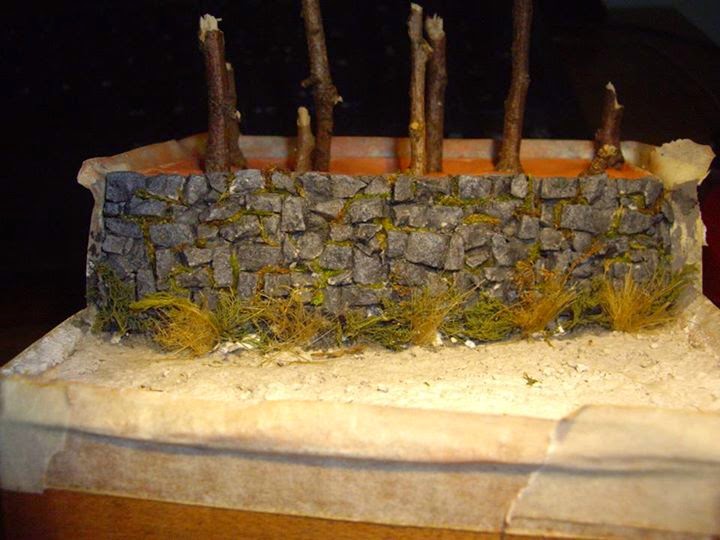 |
| Il muro di contenimento del diorama con la DKW / The retainig wall of the DKW's diorama |