Visualizzazione post con etichetta militair. Mostra tutti i post

sabato 13 settembre 2014

Come costruire un muro di contenimento in pietra / How to build a stone retaining wall

Spesso può capitare di progettare un diorama od una scena strutturata su più livelli, e se decidessimo di non limitarci a ricreare un burrone od una scarpata, ma vogliamo provare a creare un muro di contenimento? ecco il metodo che ha messo a punto il sottoscritto, i materiali necessari sono:

Can often happen to design a diorama or a scene structured on several levels, and if we decided not to limit ourselves to recreate a ravine or a cliff, but we want to try to create a retaining wall? here is the method I developed, the materials needed are:

- Materiale per creare una cassaforma /  Material to create a mold;
- Un supporto per il muro (legno di balsa, legno multistrato, una striscia di plasticard...) / Support for   the wall (balsa wood, plywood, a strip of plasticard ...);
- Un taglierino / A utility knife;
- Colla vinilica (io uso la Pattex vinil legno, ma anche la Bison o altro va benissimo ) / PVA glue (I       use Pattex vinyl wood, but also the Bison or else is good); 
- Gesso scagliola / Gypsum plaster;
- Un cucchiaino / A teaspoon; 
- Un pennello a punta piatta / A flat-tipped brush; 
- Bicchieri di plastica / Plastic cups.
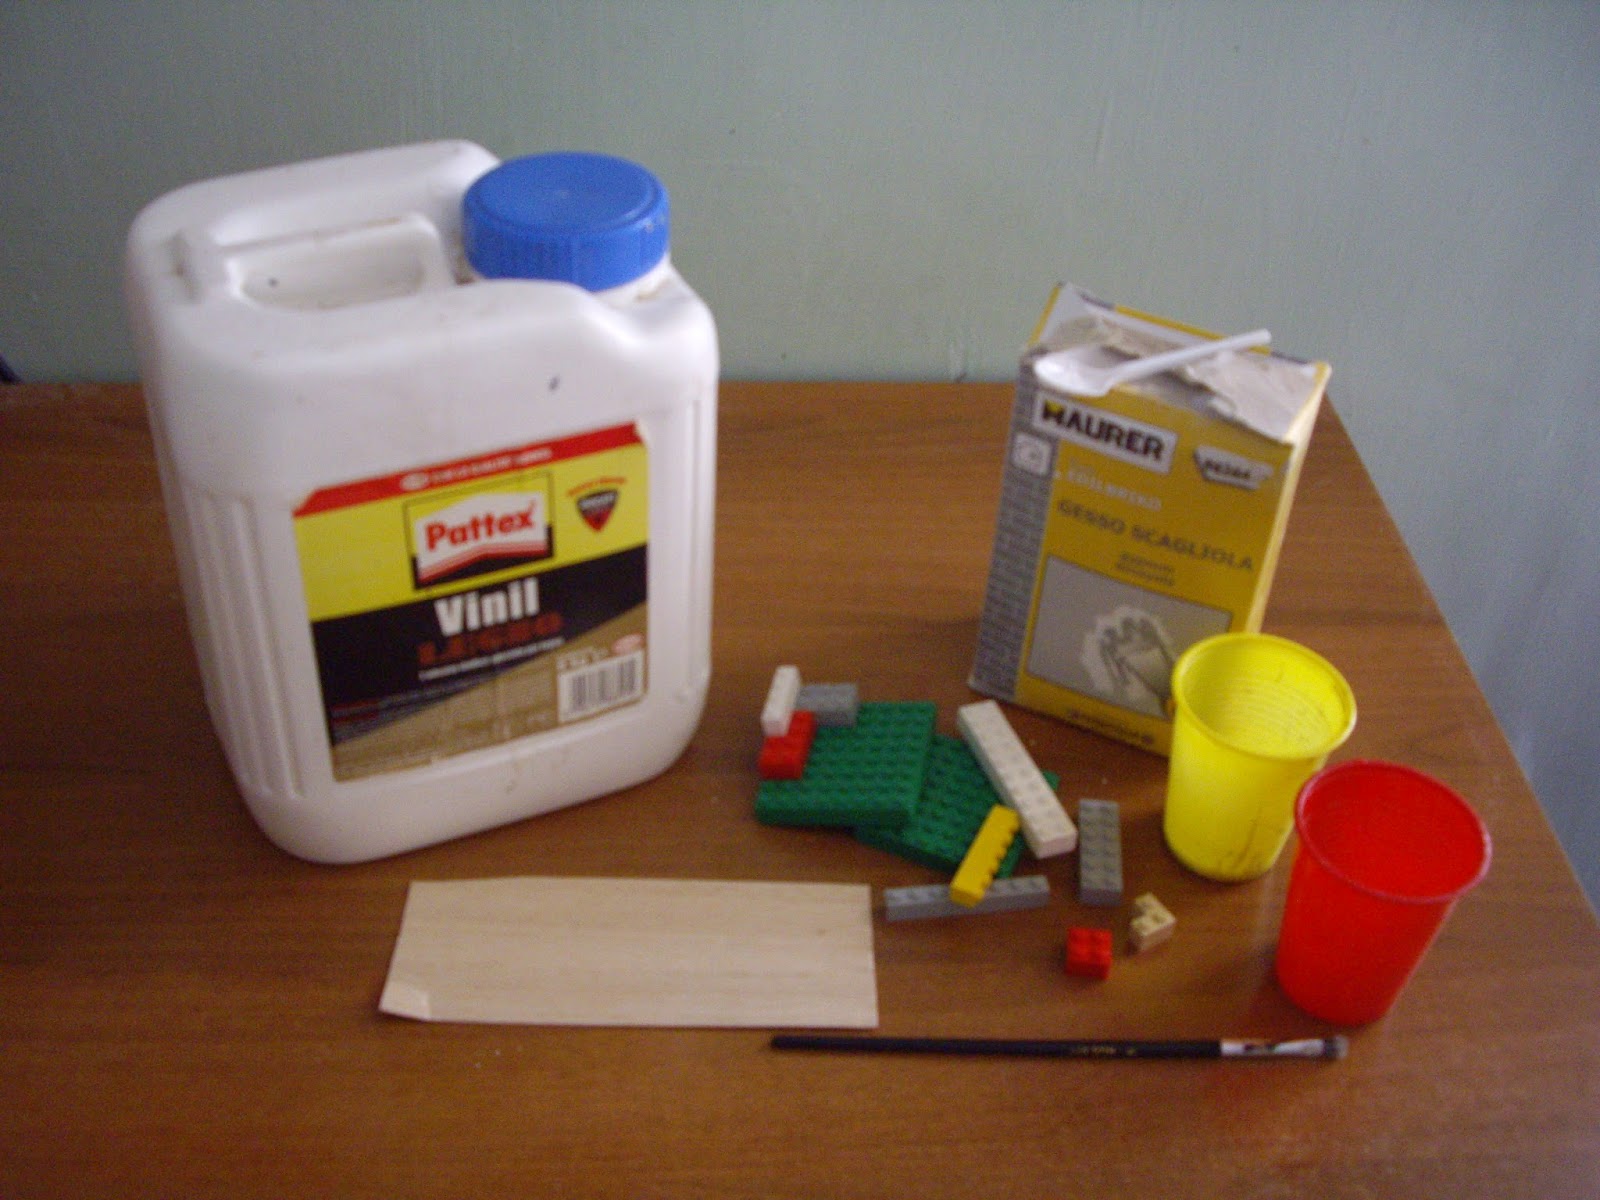
materiali
L'occorrente / What we need

Come cassaforma è da un po' di tempo che utilizzo i vecchi mattoncini Lego con cui giocavo quando ero piccolo; sono ottimi per creare forme e stampi delle dimensioni più varie ed hanno il vantaggio che una volta finito il lavoro, si possono smontare, sciacquare e riutilizzare ancora.

As mold I use now the old Lego bricks I played with when I was child; are great for creating shapes and molds of various dimensions and have the advantage that once finished the job, you can remove, wash and re-use them again.
stampo
Lo stampo di Lego / The Lego mold

Costruiamo uno stampo delle dimensioni che riteniamo opportune alla scala ed alle dimensioni che abbiamo pensato, in maniera tale da ottenere, una volta asciutta, una lastra di gesso.

We build a mold of the dimensions that we believe appropriate to the scale and dimensions that we thought, in such a way we want to obtain, once dry, a plaster slab.

Procediamo poi mischiando in un bicchiere di plastica il gesso e l'acqua, fino ad ottenere un impasto omogeneo, né troppo grumoso né eccessivamente liquido, allo scopo vi consiglio di dosare l'acqua con una siringa senza ago, così da non correre il rischio di esagerare.

We then proceed by mixing in a plastic cup gypsum and water, until dough is smooth, not too lumpy or too liquid, for the purpose I recommend you to dose the water with a syringe needleless, so as not to run the risk to exaggerate.


Versiamo il composto nello stampo ed attendiamo l'asciugatura (facciamo passare almeno un giorno, ma può essere necessario aspettare di più a seconda delle condizioni di umidità e temperatura).
Smontiamo delicatamente i pezzi dello stampo ed estraiamo la nostra lastra di gesso.
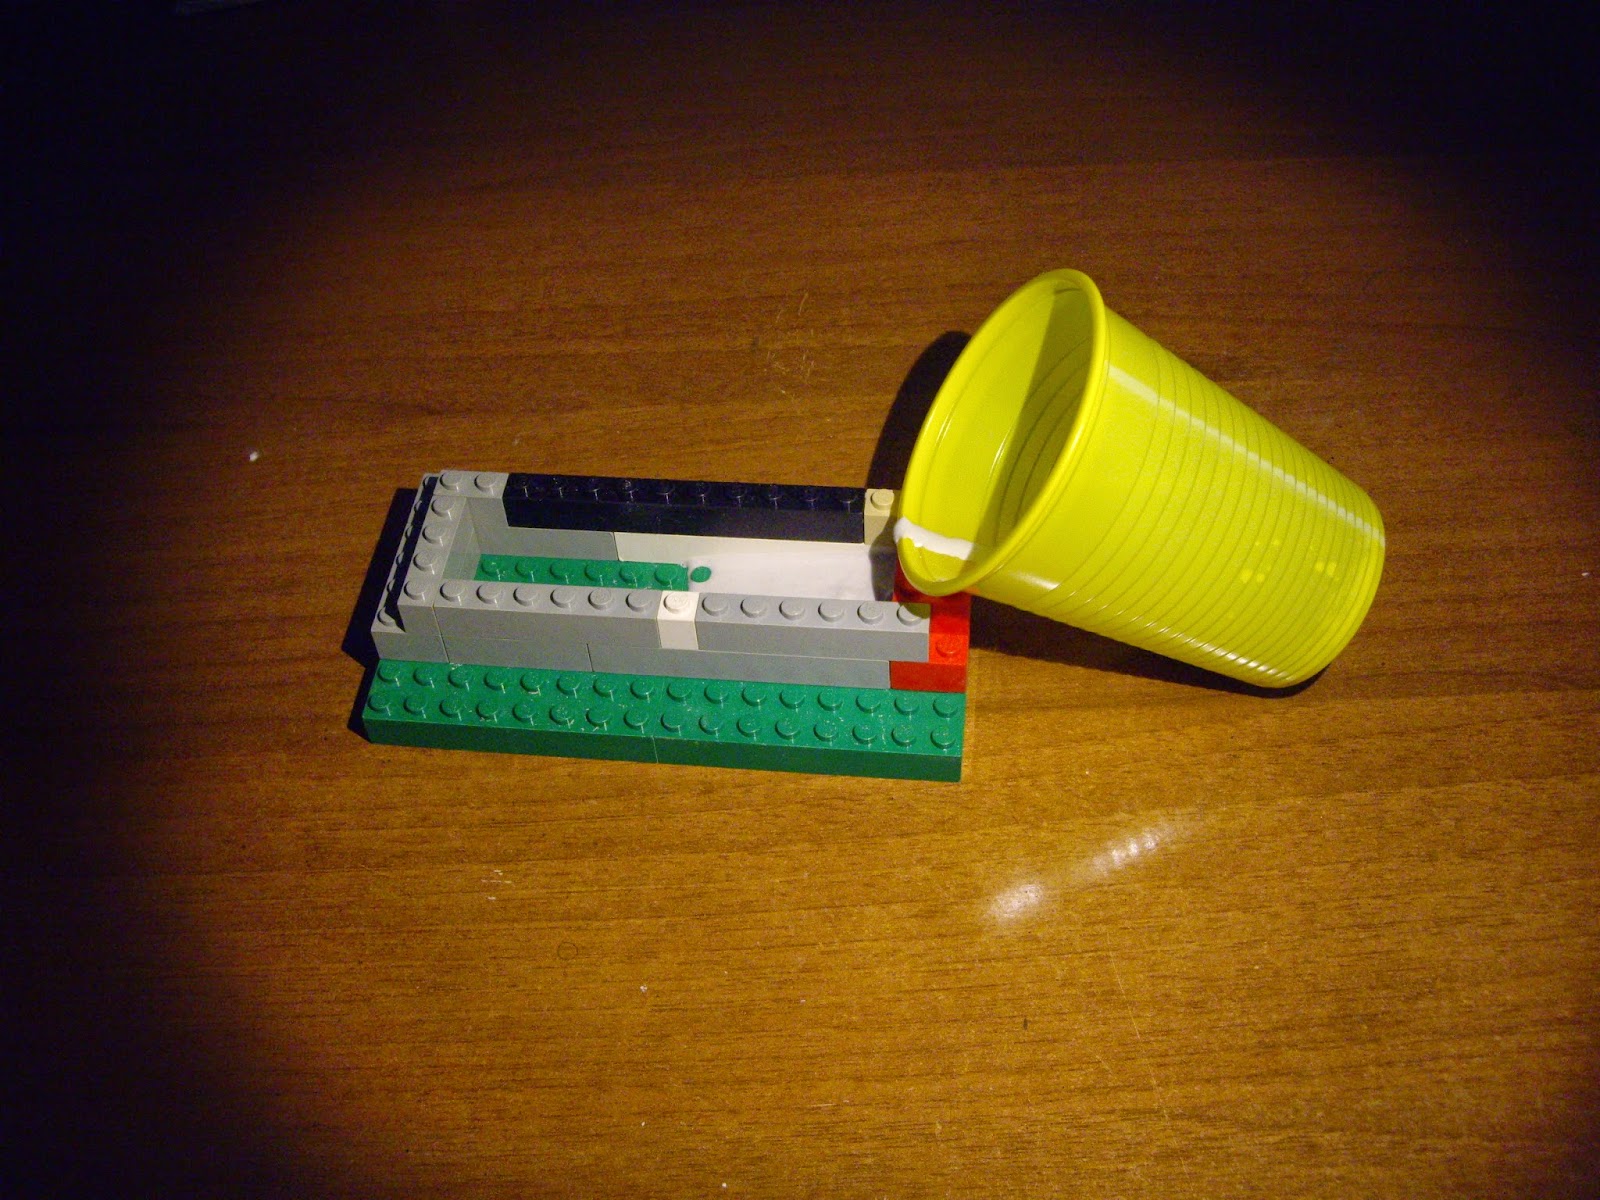
Pour the mixture into the mold and wait for drying (it requires at least one day, but it can take longer depending on the conditions of humidity and temperature). 
We disassemble the pieces of the mold and carefully extract our plasterboard. 

Con il taglierino facciamo a "strisce" la lastra dando dei colpi secchi per fratturare il gesso e rendere i pezzi irregolari, poi ripetiamo il procedimento tagliando le strisce in blocchetti, ossia nelle pietre che andremo ad utilizzare. Non preoccupiamoci se qualche pezzo si frattura o si rompe senza volerlo, farà comunque al caso nostro.

With the utility knife we make "strips" of gypsum giving the raps to fracture the plaster and make irregular pieces, then repeat the process by cutting the strips into blocks, ie in the stones we're going to use. Don't worry if some pieces fractures or breaks without meaning to, them will still do the job.

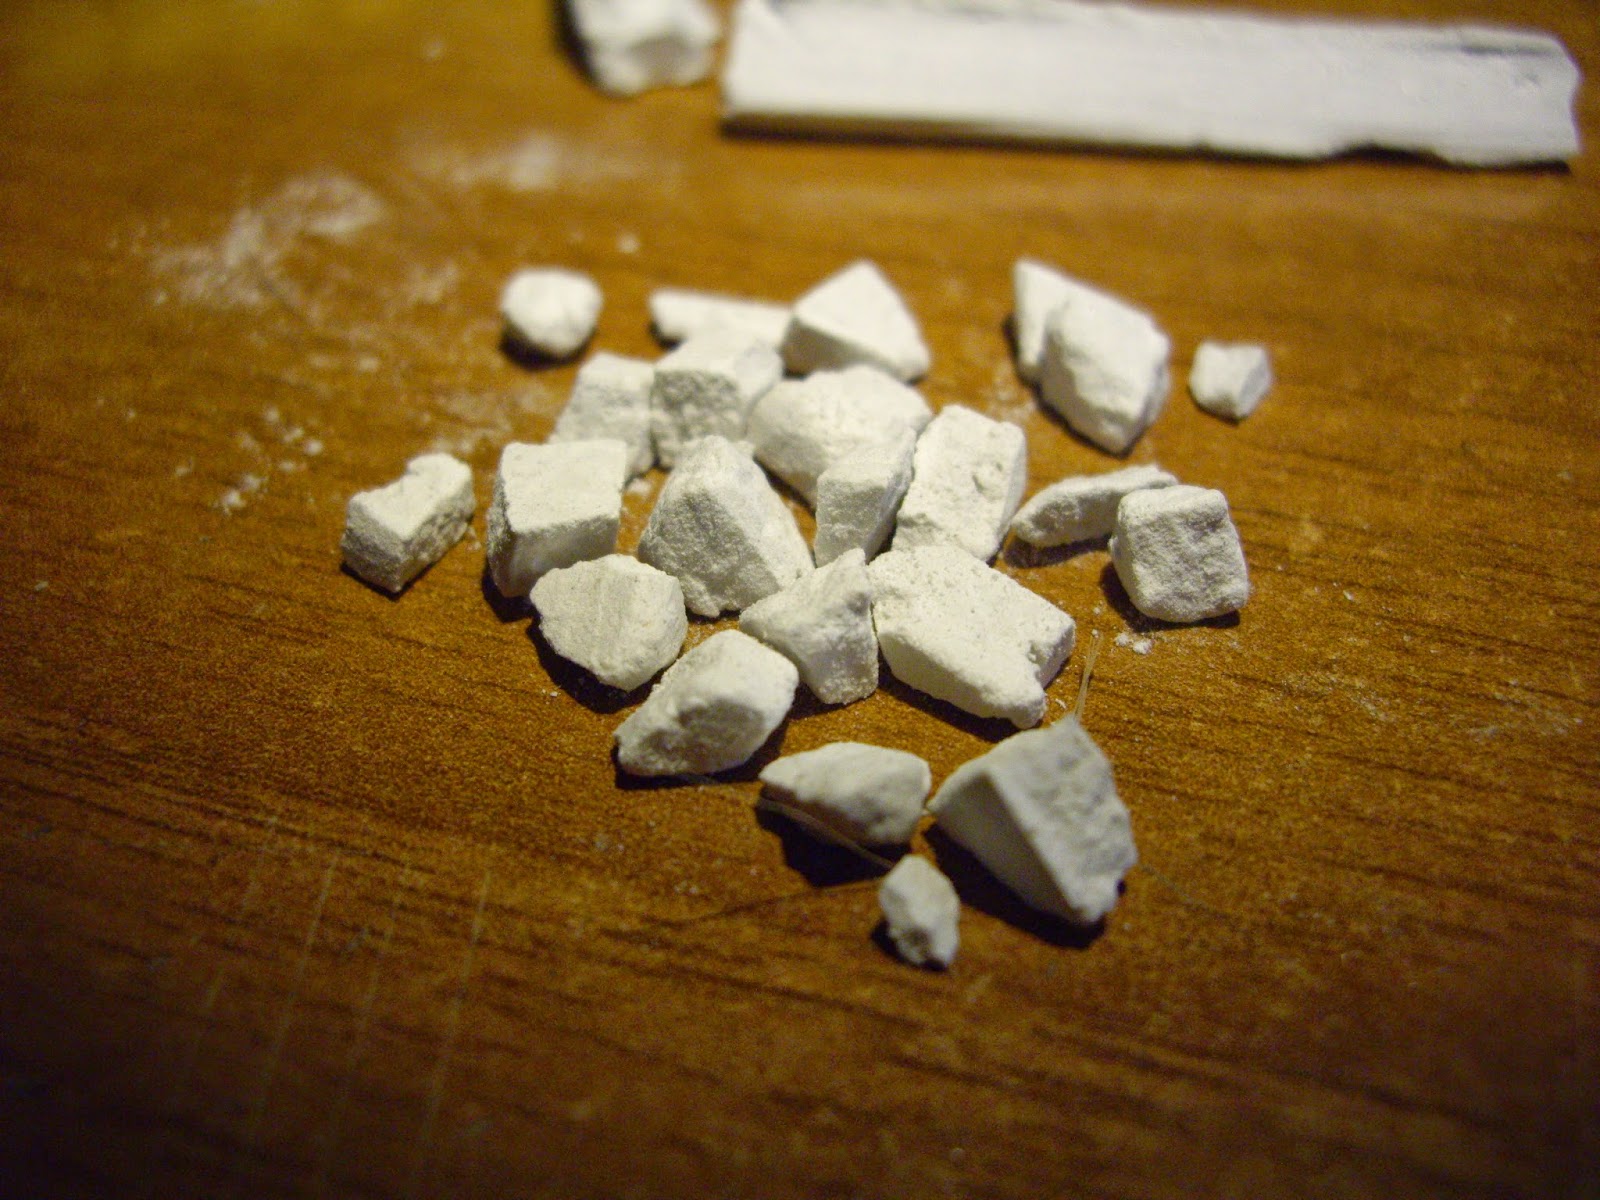
I pezzi pronti / The ready pieces 
Ora prendiamo il supporto che abbiamo scelto e dipingiamolo di nero, quindi cominciamo ad incollarci sopra con la colla vinilica i pezzi di gesso preparati in precedenza, avendo cura di sistemarli in maniera credibile ed il più possibile naturale (a tal proposito può essere utile fare qualche prova a secco prima di procedere con l'incollaggio).

Now we paint black the support that we have chosen, then we begin to glue on it pieces of gypsum prepared previously, taking care to place them in a credible manner and as natural as possible (in this regard it may be useful to make some dry test before proceeding with bonding).


Una volta finito il lavoro, se siamo soddisfatti del risultato, mischiamo in un bicchiere di plastica acqua e colla vinilica fino ad ottenere un bel bicchiere di "latte" e spennelliamo il composto sul muro, quindi, aspettiamo l'asciugatura.

Once finished the job, if you are satisfied of the result, mix in a plastic cup water and glue until you get a nice glass of "milk" and brush the wall, then wait for drying.

water PVA
Una volta che il tutto è asciutto, noteremo che la vinavil ha impermeabilizzato il gesso e reso l'opera più rigida, potremo quindi passare alla colorazione, in base ai nostri gusti o alle nostre esigenze.

Once everything is dry, you will notice that the PVA glue has sealed the plaster and made the piece more rigid, we can now go to with the painting, according to our tastes and our needs.

Se vogliamo ottenere un muro vecchio e con del verde tra le fessure, possiamo inserire negli interstizi del muschio (io ho usato quello per terraristica avendolo già a disposizione, ma ci sono molti prodotti, anche specifici, che possono fare al caso nostro), aiutandoci con un paio di struzzicadenti e ridare una mano di acqua e vinavil per sigillare anche questo passaggio.

If you want to obtain an old wall with grrenish moss among the blocks, you can insert in the interstices moss (I used one for vivarium having already available, but there are many products, even specific, that can use for this job), use a pair of chopsticks for helping and give a coat of water and PVA glue to seal everything.

moss

Esempio di muro terminato con l'aggiunta di muschio / Exemple of finished wall with moss applied

Una volta completato, il nostro muro di contenimento è pronto per essere inserito nel diorama che lo ospiterà.

Once completed, our retaining wall is ready to be inserted into the diorama that will host it.
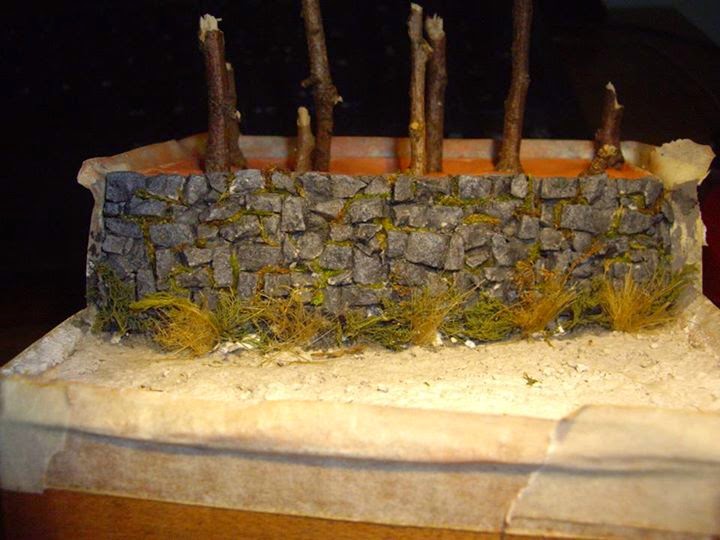
Il muro di contenimento del diorama con la DKW / The retainig wall of the DKW's diorama


giovedì 11 settembre 2014

DKW 350 NZ tamiya 1/35 & Alpine german motorcyclist

L'ultima scenetta sfornata in questi giorni, una DKW Tamiya accoppiata ad un soggetto Alpine miniatures.
motorcycle crew
La scena d'insieme / the overall view
La DKW è un modello in circolazione da tempo, pensato per essere veloce da montare è abbastanza basico per quel che riguarda il montaggio ma allo stesso tempo non sacrifica troppo i particolari.
DKW 350 1/35I lavori di modifica, svolti con l'ausilio di una pletora di foto e documentazioni varie reperite on-line, ha riguardato soprattutto i raggi delle ruote, rifatti uno ad un con del sottilissimo fil di ferro ( in verità è un lavoro più noioso che difficile, ma ne vale la pena, perchè i raggi in plastica gridavano vendetta). Successivamente sono passato a rifare il meccanismo del cambio ed ho aggiunto il clacson accanto alla batteria.La catena, che da kit è fornita senza particolari, è stata semplicemente incisa con il cutter, dato che una volta montata risulta poco visibile. Il faro anteriore è stato anch'esso modificato, aggiungendo u semicerchio di fil di ferro per simulare il supporto dello stesso. Infine sono stati aggiunti un po' di cablaggi.

DKW 350 1/35
Un modello sicuramente divertente, anche se per portarlo agli standards moderni richiede qualche lavoro di modifica.

Il figurino Alpine non è stato in alcun modo modificato (certo non ne ha bisogno!) ma solo dipinto al meglio delle mie (scarse) possibilità seguendo anche in questo caso la documentazione trovata su internet. Si compone di pochi pezzi ed il dettaglio ovviamente è pazzesco. Che altro dire...è un Alpine, quindi una garanzia.

Alpine motorcyclist
La scena che fa da contorno ai due soggetti è stata fatta tutta con elementi naturali con una sola eccezione, le foglie di quercia Plus model (ottimo prodotto, che aggiunge un tocco magico e realistico al tutto). Per il resto infatti il terreno non è altro che vero terriccio setacciato (mentre il selciato è fatto di sabbia), la vegetazione proviene da una passeggiata nel giardino della mia fidanzata (c'è persino qualche ciuffo di finocchio selvatico), con l'aggiunta dell'immancabile canapa da idraulico e della posidonia. Il sottobosco si compone oltre che delle foglie tagliate al laser Plus model, anche di varie erbe aromatiche da cucina sminuzzate e da una foglia secca raccolta e triturata.
I tronchi, infine, sono ramoscelli di quercia anch'essi raccolti in natura (ma penso che i rami di un po' tutte le piante siano adatti allo scopo).
Il tutto è stato poi passato più volte con acqua e vinavil.
stone wall diorama
Il diorama in fase di costruzione/ the diorama in progress
dettaglio muro pietra
Dettagli del muro / wall detail
DKW 350 1/35
Il muro invece è composto da pezzi di gesso scagliola tagliati e spezzati con l'ausilio di un taglierino, incollati su un supporto di legno, spennellati di acqua e vinavil e dipinti di grigio. Una volta che tutto si è asciugato, ho provveduto a inserire tra gli interstizi più profondi piccoli pezzi di muschio per terrari (l'altra mia piccola passione). A sigillare il tutto ci ha pensato l'ennesima mano di acqua e vinavil (fortunatamente ho la tanica da 5 chili di colla vinilica).
Il risultato finale è quello in foto, la basetta è fatta di semplicissimo legno multistrato tagliato a misura, smussato agli angoli per ottenere un cubo e poi dipinto con varie tonalità di marrone per ottenere il tono di legno desiderato.

Un lavoro piccolo, che ha richiesto poche settimane di lavoro (anche se spalmate su un tempo più lungo) ma che mi ha soddisfatto molto e mi ha permesso di testare una nuova tecnica (per il muro) su cui riflettevo da tempo.

--------------------------------------------------------------------------------------------------------------------------

The last kit made in these days, a DKW Tamiya with a subject from Alpine miniatures.
The DKW is  a long time model, thought to be quick to assemble, so it is basic in the building but at the same time does not sacrifice particoulars. The modification work was carried out with the aid of a plethora of photos and various documents found on-line, it has focused mainly on the spokes of the wheels, redone one by one with the thin wire (in truth is a tedious work, but not hard, and it's worth it, because the spokes made of plastic cried vengeance). Then I switched to rebuild the shift mechanism and added the horn next to the  batteries .The transmission chain, which in the kit is supplied without details was simply engraved with the cutter, because once mounted is not very visible. The headlight was also modified by adding a semicircle of wire to simulate the support of the same. Finally I have added wirings .A definitely fun model, though to bring it to modern standards requires some extra work.


The  Alpine figure has not been modified in any way (certainly does not need it!) But only painted to the best of my (limited) possibilities, even in this case I have followed the documentation found on the internet. The subject consists of a few pieces and the detail is obviously amazing. What else to say ... it's an Alpine, so it is guaranteed.
The scene that surrounds the two subjects was made with all natural elements with one only exception, the leaves of oak  made by Plus model (excellent product, which adds a touch of magic and realistic). For the rest, the ground is nothing but true sieved soil (while the street is made of sand), the vegetation comes from a walk in the garden of my girlfriend (there's even a few tufts of wild fennel), with the inevitable addition of hemp and sea grass. The undergrowth consists of the laser-cut leaves by Plus model, but it is also made by various herbs from the kitchen and by a dry leaf chopped and shredded.
The trunks, are also oak twigs collected in nature (but I think the branches of all the trees are fit for purpose).
DKW 350 1/35The whole was then passed several times with water and vinavil. The wall instead is composed of pieces of plaster cut and broken with the aid of a cutter, glued on a support of wood, brushed with water and PVA glue and painted in gray . Once everything has dried, I proceeded to enter the interstices between the deepest pieces with small portions of moss for terrariums (my other little passion). Another coat of PVA glue and water sealed everything (fortunately I have the  5 pounds canister of glue) .The final result is in the photo, the base is made of simple plywood cut to size, with angles edged to get a cube and then painted with various shades of brown to get the wood tone I want.

A little work, which required a few weeks of work (even if spread over a longer time) but I was very satisfied, and this allowed me to test a new technique (for the wall) I had considered for a long time.

diorama foglie